Introduction
Welcome, and thank you for your interest in extending your SFWEM Portable Access Node (PAN) to include an IP phone. Please note:
• This is a living document, and subject to improvement.
• This is not an endorsement of specific brands or resellers. It is provided for your convenience.
• If you have your own substitutions, please feel free to customize. These components are known to work allowing easy support through standardization.
Add a Camera to your PAN
Configure your PAN
Bill of Materials
| Component | Description | |||
|---|---|---|---|---|
| Option | Phone | Cisco SPA 525G2 | BUY | BUY |
| Option | Phone PWR Adaptor | 5V USB Pwr Cable Cisco SPA525G2 | BUY | BUY |
| Option | Phone Battery | USB Battery Pack | BUY | BUY |
Assembly
- Connect the USB power cable to your battery.
- Connect the USB power(AC converter) cable to your SPA 525G.
- Connect an ethernet cable to the "SW" port on the SPA 525G.
- Connect the other end of the ethernet cable to the LAN port on the AirGATEWAY of your PAN.
Configuration
Phone Config
- After the SPA 525G has completed the boot process, follow these instructions to get the IP address of the SPA 525G.
- Using a computer, connect to the wireless network of your PAN.
- Once connected to your PAN, launch your web browser.
- Key in the IP address from Configuration instruction #1 into the URL line of your web browser.
-
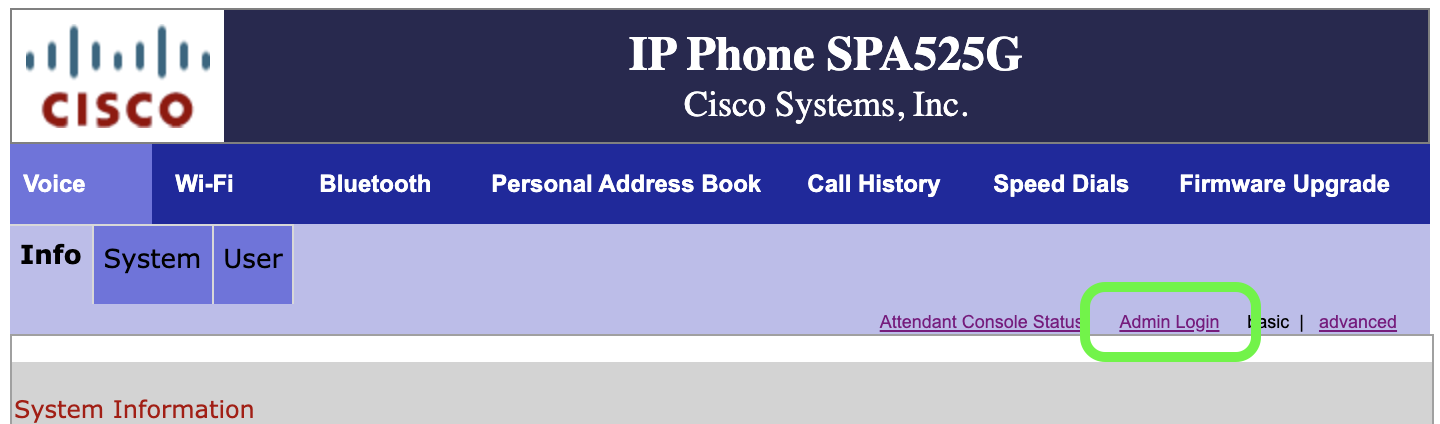
Once the phone's web based control interface loads, in the header with links and buttons, find "Admin Login" and click the link.
-
Click on the "EXT 1" tab.
- Enter these details
• Proxy and Registration: Proxy: orion-server.local.mesh
• Subscriber Information: Display Name: Your assigned extension number
• Subscriber Information: User ID: Your assigned extension number
• Subscriber Information: Password: Your assigned extension password
• Audio Codec: Preferred Codec: G729A
• Audio Codec: Second Preferred Codec: G711A
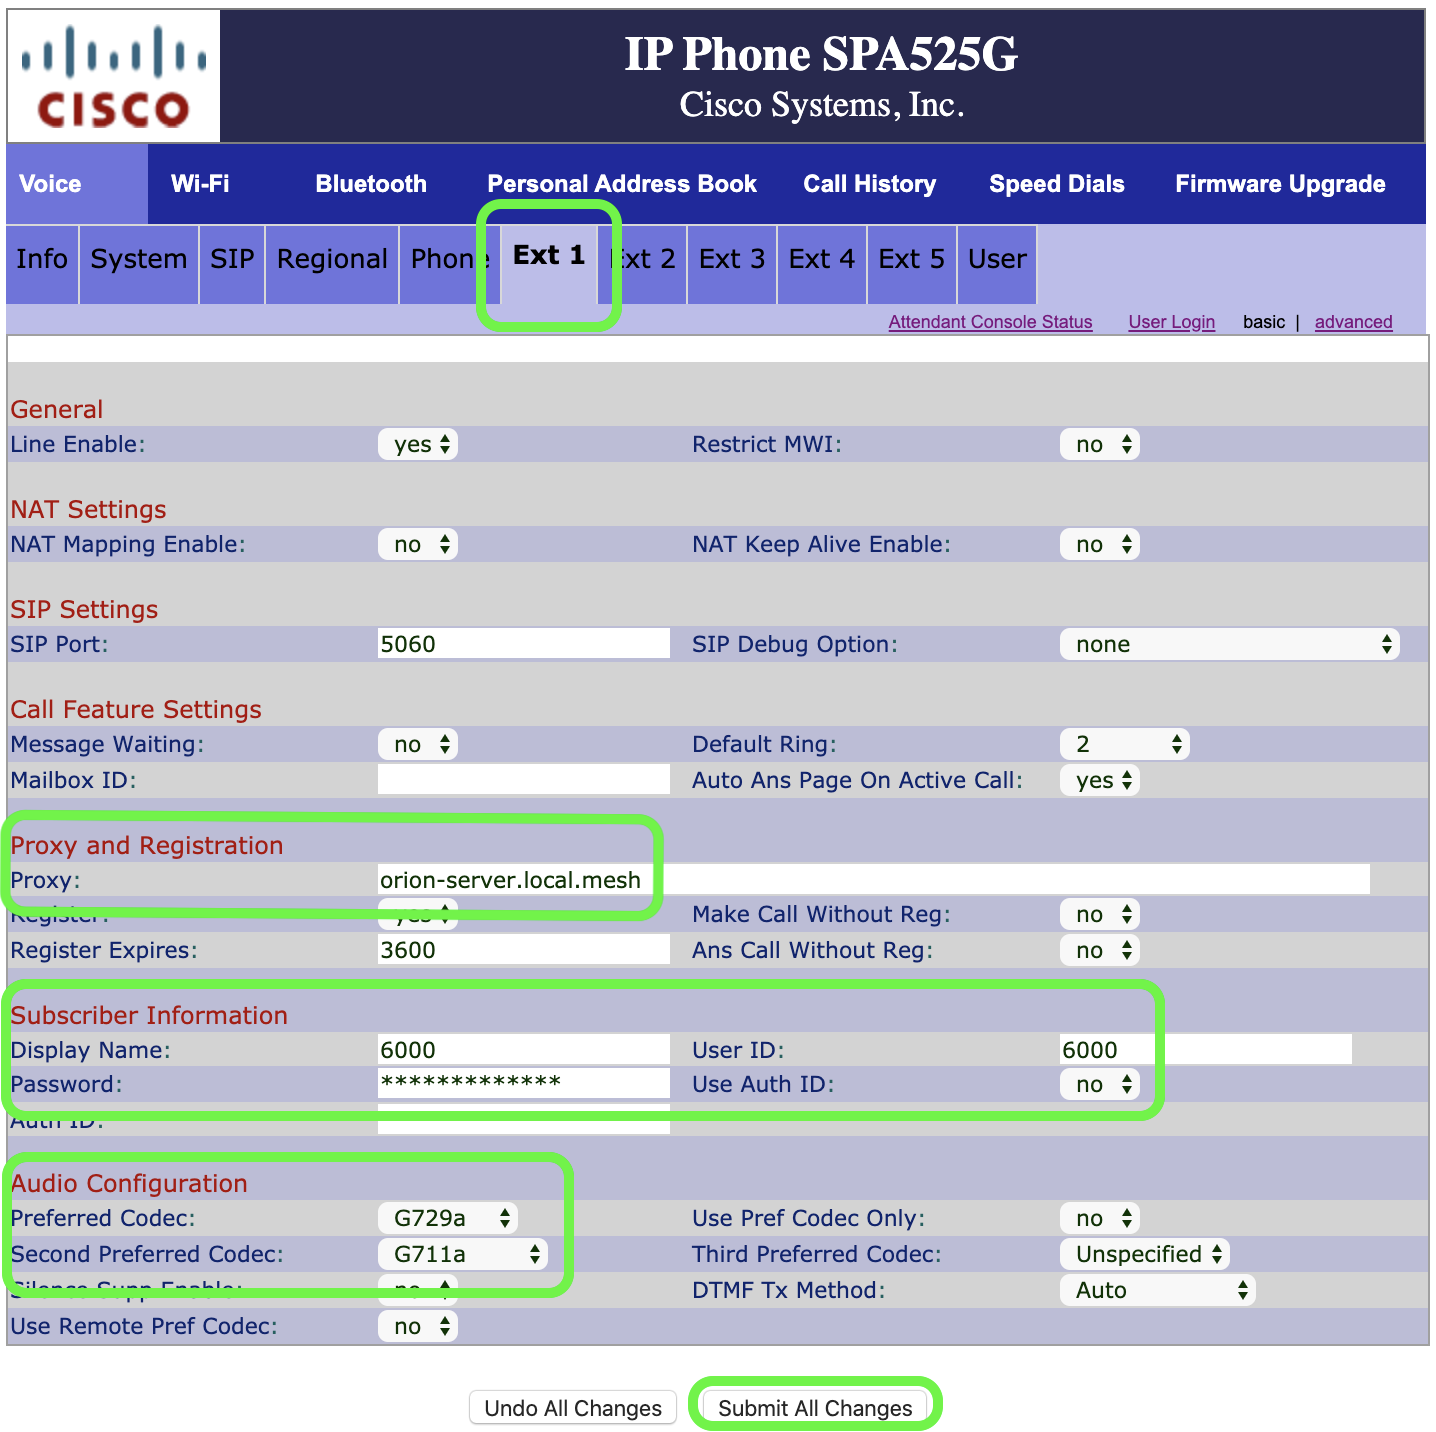
- Press the "Submit All Changes" button at the bottom of the page.
Wi-Fi Config
Please note, wi-fi use may degrade audio quality when compared to using a wired connection.
- Presuming you are still connected to your SPA 525G's web interface, find the "Wi-Fi" tab and click on it.
- Find the "site survey" button and click on it.
- A pop-up window will appear, find the SSID you gave to your AirGATEWAY. Then look to the right of the SSID and click the folder with a green plus symbol.
- In the next pop-up window, give the profile a name in the Wi-Fi Profile Name field. (Pro Tip: enter your AirGATEWAY SSID into into this field.) When the details are correct, press the "Submit All Changes" button.
- You should have now been returned to the Wi-Fi menu, be sure the enable check box has a green check mark. If not, click the empty checkbox to toggle it to being checked.
- Click the "Submit All Changes" button.
- Disconnect the power supply to the phone to power it off.
- Disconnect the ethernet cable you connected in "Assembly" #3.
- Reconnect the power supply to the phone, and it should join the wi-fi network of your AirGATEWAY.
- Make a test phone call.
SFWEM is a volunteer-led project.
v1.1 Last Updated: 11-04-2020